
Hot Chocolate Bombs (Easy How-To Recipe)


Hollow spheres of decadent chocolate are filled with powdered cocoa mix and mini marshmallows. Place one in a large mug and add hot milk to watch it burst open and spill its chocolatey goodness. These hot chocolate bombs are easier to make than you think and are so much fun. They will become your favourite way to indulge in this cold-weather beverage over the fall and winter seasons.

This post may contain affiliate links. As an Amazon Associate, I earn from qualifying purchase
Nothing is better than a delicious cup of hot chocolate on a cold winter day.
While packaged mixes of hot chocolate powder make a decent cup, a mug of hot cocoa made with a homemade chocolate bomb is even better.
They are so much fun to make and easy enough that the whole family can be involved. We will show you how to make them using the techniques, tips, and tricks we’ve found to yield the best results.
What are Hot Chocolate Bombs?
Hot chocolate bombs are decadent, hollow spheres of chocolate filled with cocoa mix and marshmallows.
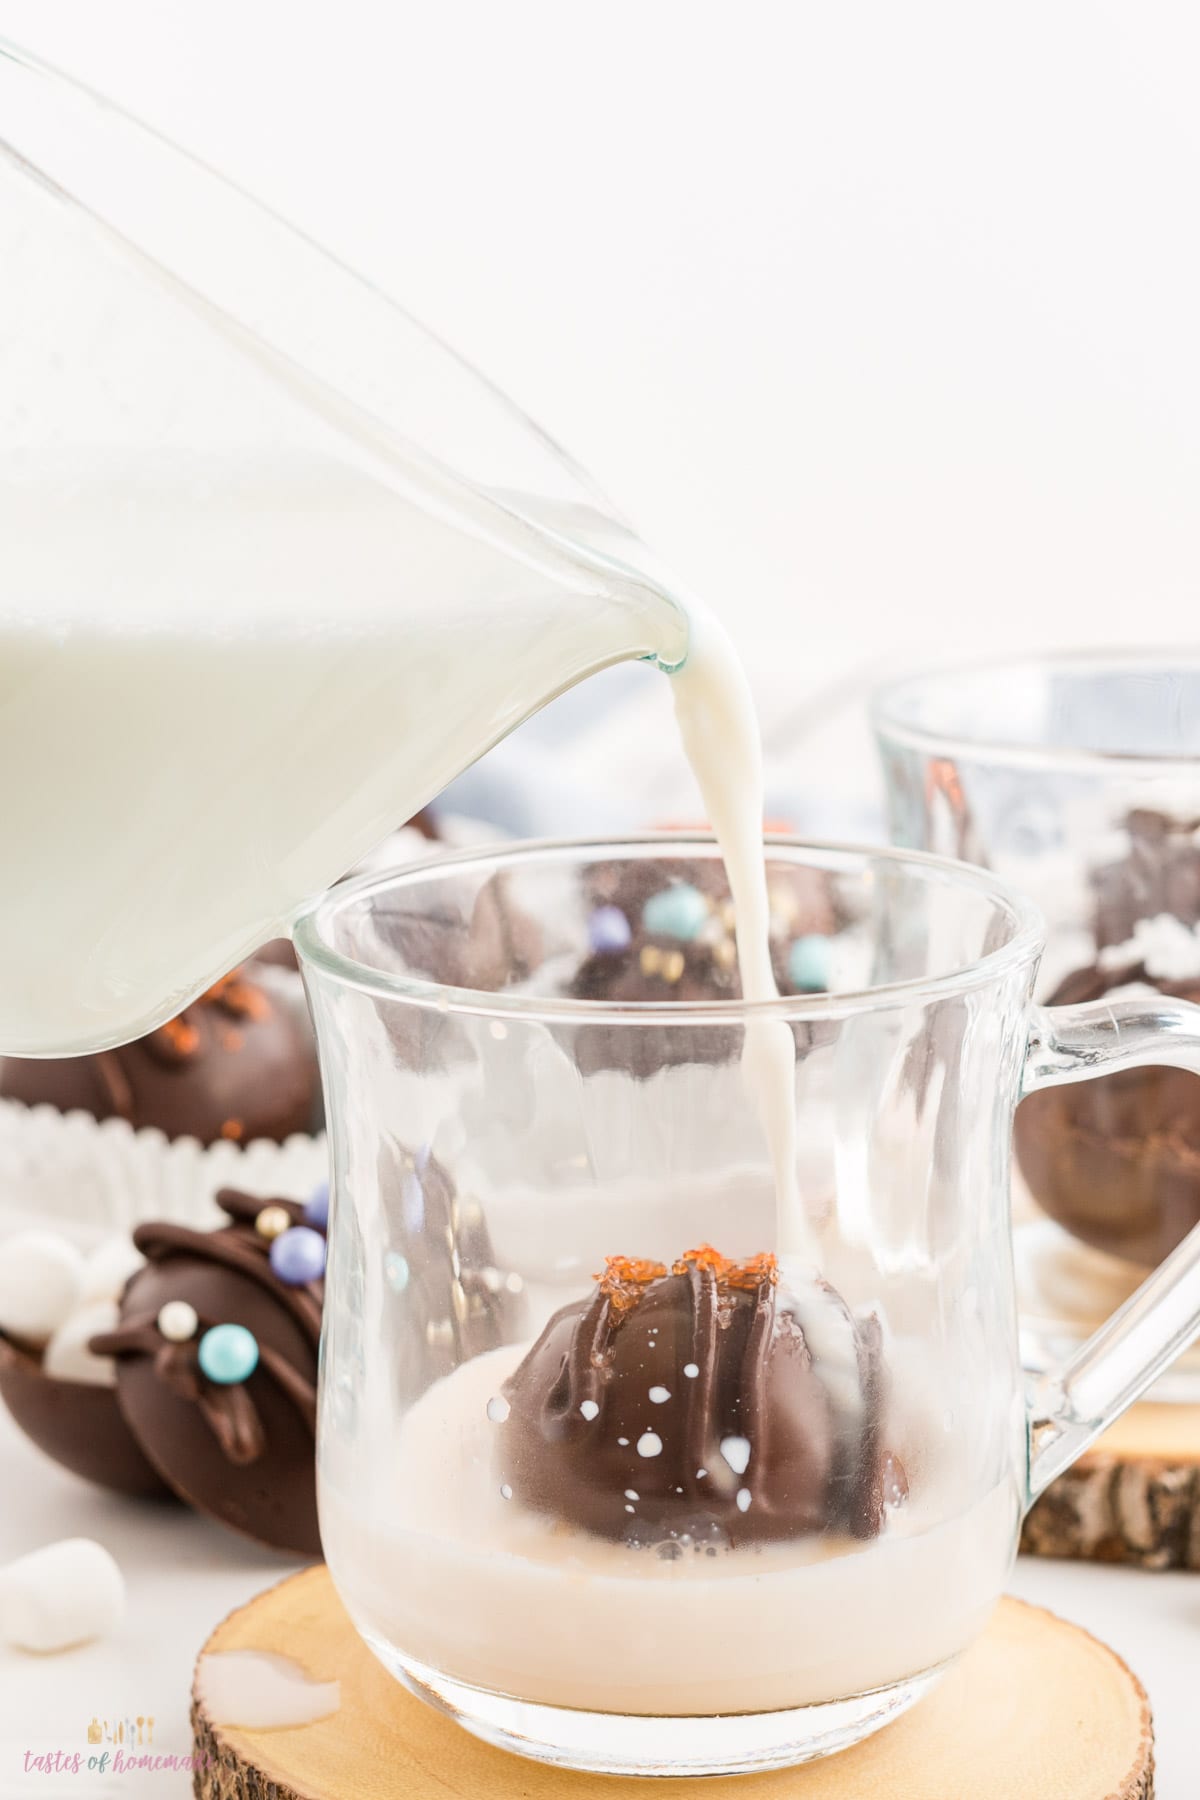
To turn them into hot chocolate, place them in a mug, add some hot milk, and watch them melt, releasing all the good cocoa fixings inside.
The basic hot chocolate bomb is made with just three ingredients: chocolate, cocoa mix, and marshmallow, but you can turn these into gourmet hot cocoa by adding a bit of instant coffee, crushed candy canes, caramels, or anything else you can think of.
You can keep them simple, using store-bought ingredients only. Or you can get more creative and make them even more special by using homemade hot cocoa mix.
They are easier to make than they look, and the kids will love decorating them before they drench them in milk and watch them burst open.
They also make lovely gifts.

How do Hot Chocolate Bombs Work?
It’s pretty simple. Just place them in a mug and pour hot milk over them.
They will split open, releasing the cocoa mix and marshmallows while the chocolate shell will melt, resulting in the most decadent, delicious cup of hot cocoa you could dream of.
For these bombs, I’ve found that 8 to 10 ounces of milk is perfect (about 1 Cup), but of course, that will depend on how strong you like your hot chocolate.
Ingredients
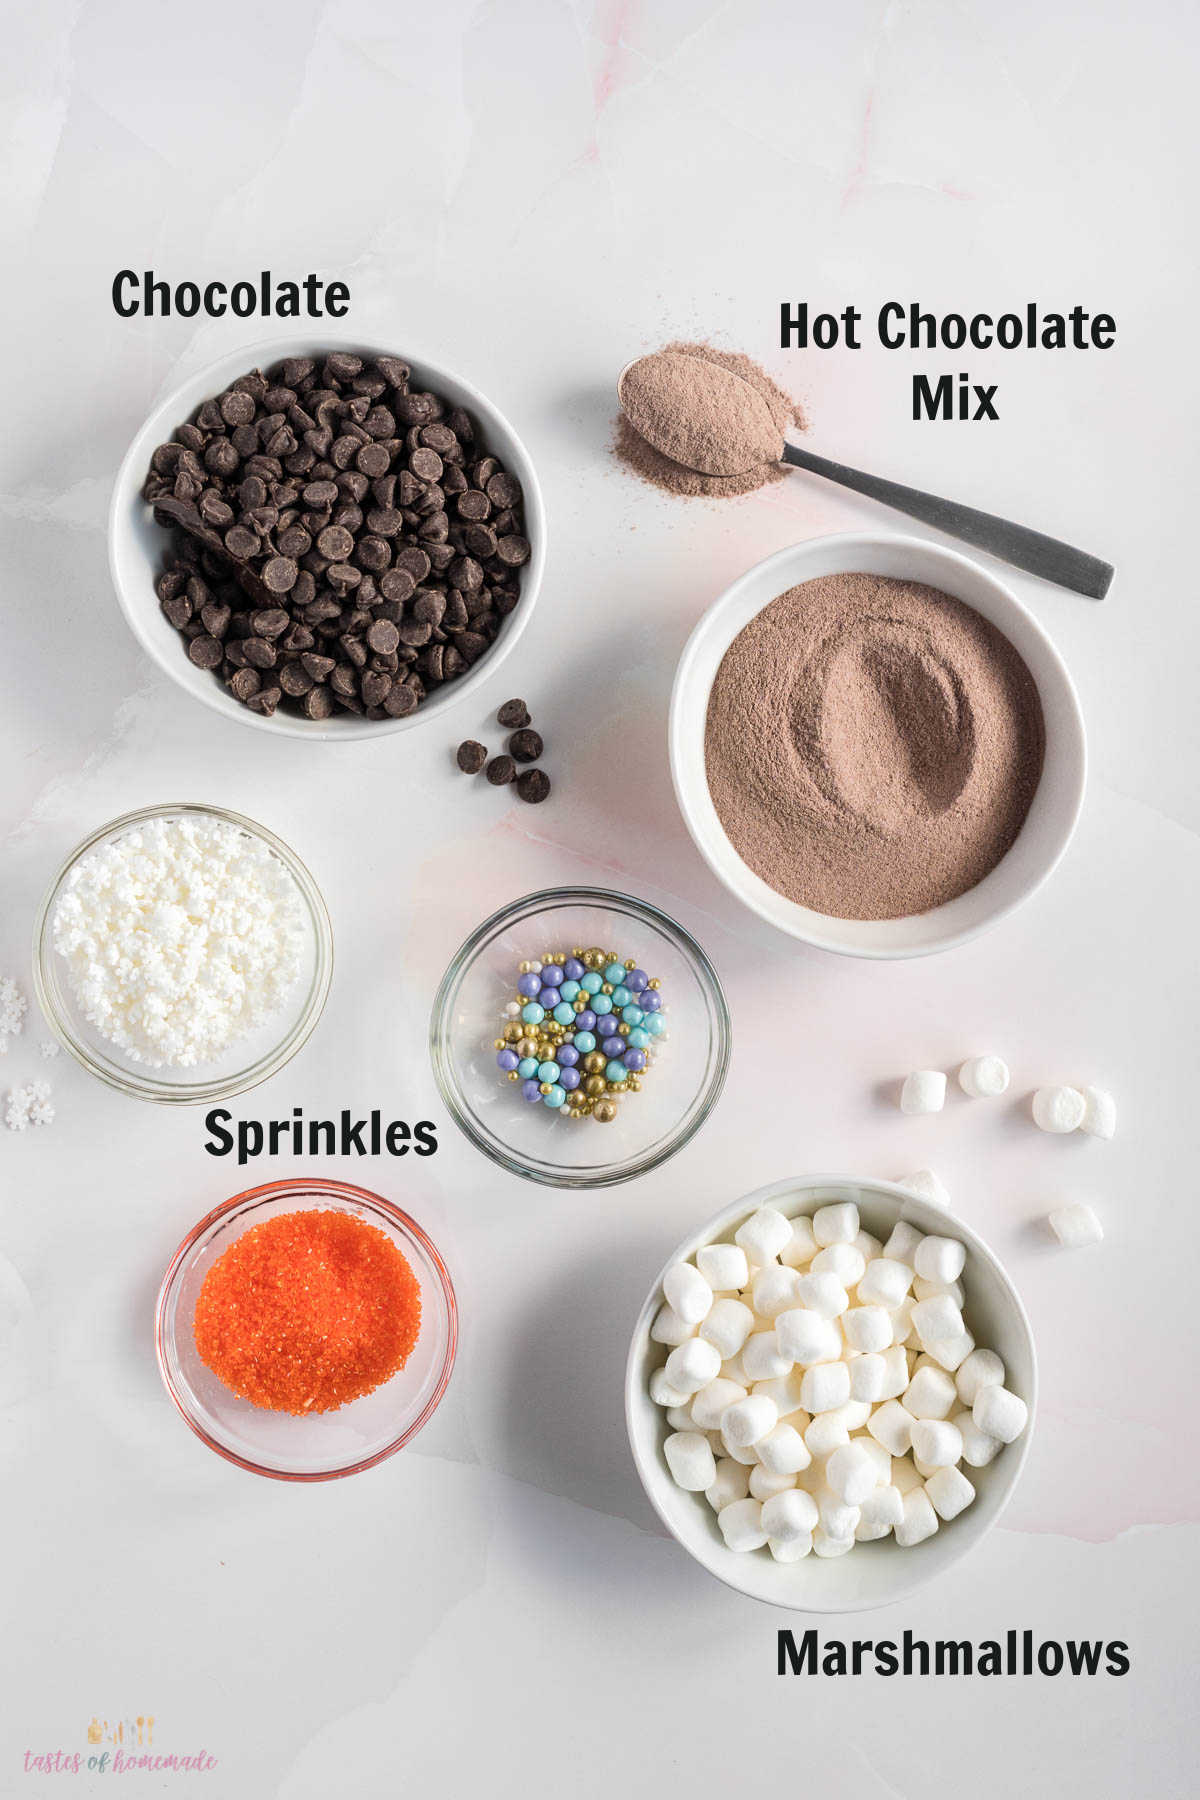
There are only three must-have, simple ingredients to make these hot chocolate bombs.
- Chocolate – You can use milk, semi-sweet or dark; it’s up to you. Chocolate chips work fine; choose a higher-quality brand. You can also use good-quality chocolate bars or baking chocolate. We suggest avoiding the cheaper candy melts, as some are only chocolate-flavoured and contain no chocolate. If you want to use candy melts or chocolate wafers, you will want to ensure they are made with real chocolate. Make sure cocoa butter is listed as one of the ingredients.
- Hot Cocoa Powder – Use your favourite here. The better quality brand you choose, the tastier your hot chocolate will be. For even better flavour, and to make them even more special, you can use homemade.
- Marshmallows – Mini marshmallows will work best. If you like the coloured marshmallows, you can use those or stick with the traditional ones. You can even find extra tiny dehydrated marshmallows, which work well and allow you to fill the chocolate bombs really full.
You will probably want to decorate your cocoa bombs, too. I like to use a variety of fun candy sprinkles, but you can use crushed mints, shaved chocolate, or a simple drizzle of white chocolate. Get creative and have fun! There is absolutely no wrong way to decorate your chocolate bombs.
Step by Step Instructions
One – The first step is melting the chocolate that will form the hollow chocolate spheres.
I prefer doing this in a glass heat-safe bowl over a simmering pot of water; this is the double boiler method. I have better control of the melting than when using a microwave, and I can keep the bowl over the hot water as I work, which keeps the perfect consistency. If you have an actual double boiler, you can use that instead.
However, when using this method, you must be careful not to let water enter the chocolate bowl. Water will cause the chocolate to seize and solidify, making it impossible to spread.
Fill the pot enough so the bottom of the bowl barely touches the water. Heat over medium-low heat (I use setting four on my stove top) until melted and smooth. Ensure you gently stir the chocolate as it heats to help disperse the heat and prevent it from getting too hot.
Remove the pot from the heat, leaving the bowl in place.
Two – Spoon about two teaspoons of chocolate into each mold.

Expert Tip – If you use the microwave to heat your chocolate, do so slowly. Use 15-second intervals and stir between each interval. Once the chocolate is mostly melted, you should be able to stir it well enough to melt the rest. If it still needs a bit longer, reduce it to 5-second intervals to avoid burning the chocolate.
Three – Using a pastry brush, brush the chocolate over the inside of the mold as evenly as you can, making sure to spread it right to the top. You can also use the back of a spoon.
Four – Once all the molds are filled, pop the tray in the freezer for 5-10 minutes so the chocolate can firm up. Then, repeat the filling, brushing, and freezing one more time.
On the second coat of chocolate, fill and brush one mold at a time; otherwise, the cold chocolate will set the melted chocolate before you can spread it.

Five – Remove the molds from the freezer. Loosen the chocolate by gently stretching the edges of the molds.
Fill six halves with hot cocoa mix and marshmallows. I have found one tablespoon of mix, and 5-6 marshmallows are perfect.

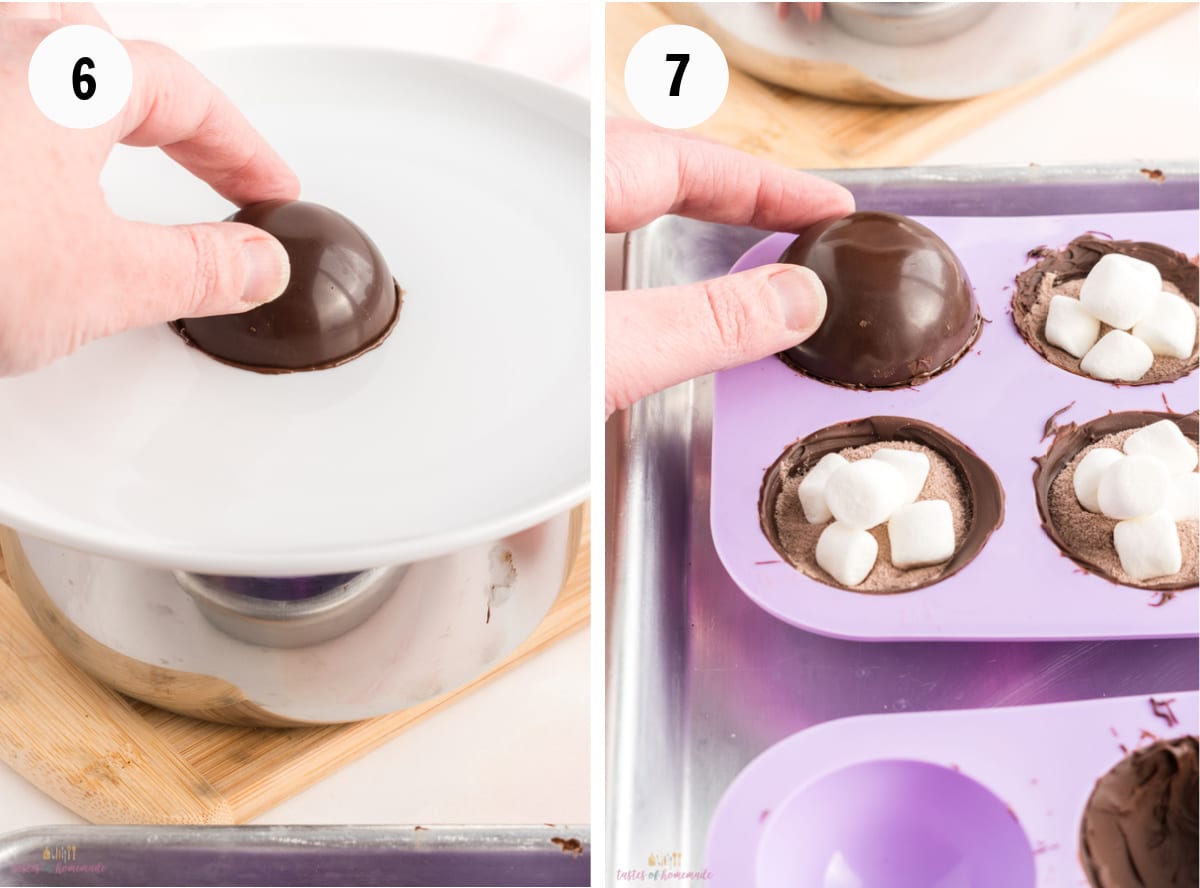
Six – Place a clean plate over the hot pot of water. The steam will warm the plate.
Remove the empty halves from the mold and, working one at a time, press the edge of the chocolate shell to the warm plate.
Seven – When the edge starts to melt, remove it from the plate and press it to a filled half. Hold it for 2-3 seconds to seal. Then, repeat with the remaining shells.
Once all the bombs are sealed, pop them in the freezer for a couple of minutes so the edges will set.
I tried many ways to seal the halves together and found this was the easiest and most successful way. You could also place some melted chocolate in a small pastry bag with a fine tip, pipe it around the edge of the empty half, and then press it to the filled half.
Remove from the freezer, and carefully pop the hot chocolate bombs out of the molds.
Decorate with a drizzle of melted chocolate and sprinkles or any way you like.

If you want to make these extra special, try making your marshmallows! It isn’t as complicated as you’d think.
Variations
You can use endless variations and combinations of flavours to create your hot chocolate bombs.
Chocolate – Milk chocolate is my favourite when making hot chocolate. And a good quality milk chocolate chip will work just fine. But there are many other choices, depending on your flavour preference. You can use the following:
- White chocolate – White chocolate is mild and creamy. You will want to select high-quality white chocolate and be sure that cocoa butter is listed as the main ingredient. White chocolate is a bit more temperamental to work with; you will want to melt it slowly over low heat.
- Dark chocolate – Dark chocolate will produce a stronger, slightly more bitter hot chocolate. You can use good-quality dark chocolate chips or melting wafers.
- Mix of chocolate – Don’t think you have to stick to just one chocolate. You can make the top and bottom from different chocolate or swirl a few together for a marble effect.
Filling – There is no end to the fun things you can add to your hot chocolate bombs. You will want to choose your favourite hot chocolate mix, but aside from that, you can get creative with other additions. Here are a few things to try:
- Marshmallows – Marshmallows are always a fun addition to hot chocolate. Mini marshmallows work great in hot chocolate bombs, but you can also buy tiny dehydrated marshmallows, which allow you to fill them fuller.
- Crushed peppermint candy – Crushed peppermint candy or candy canes are a fun addition and will give you a delicious chocolate peppermint hot cocoa. The crushed peppermint candy will melt when the hot milk is added, allowing you to stir it into the hot chocolate.
- Coffee powder – To make a quick instant mocha, add your favourite instant coffee powder.
- Shaved chocolate – If you want to make your hot chocolate extra decadent, add some shaved chocolate to your hot chocolate bomb!
- Peanut butter powder – If you love the idea of a peanut butter cup hot chocolate, a scoop of peanut butter powder is a great addition.
Serving Suggestions
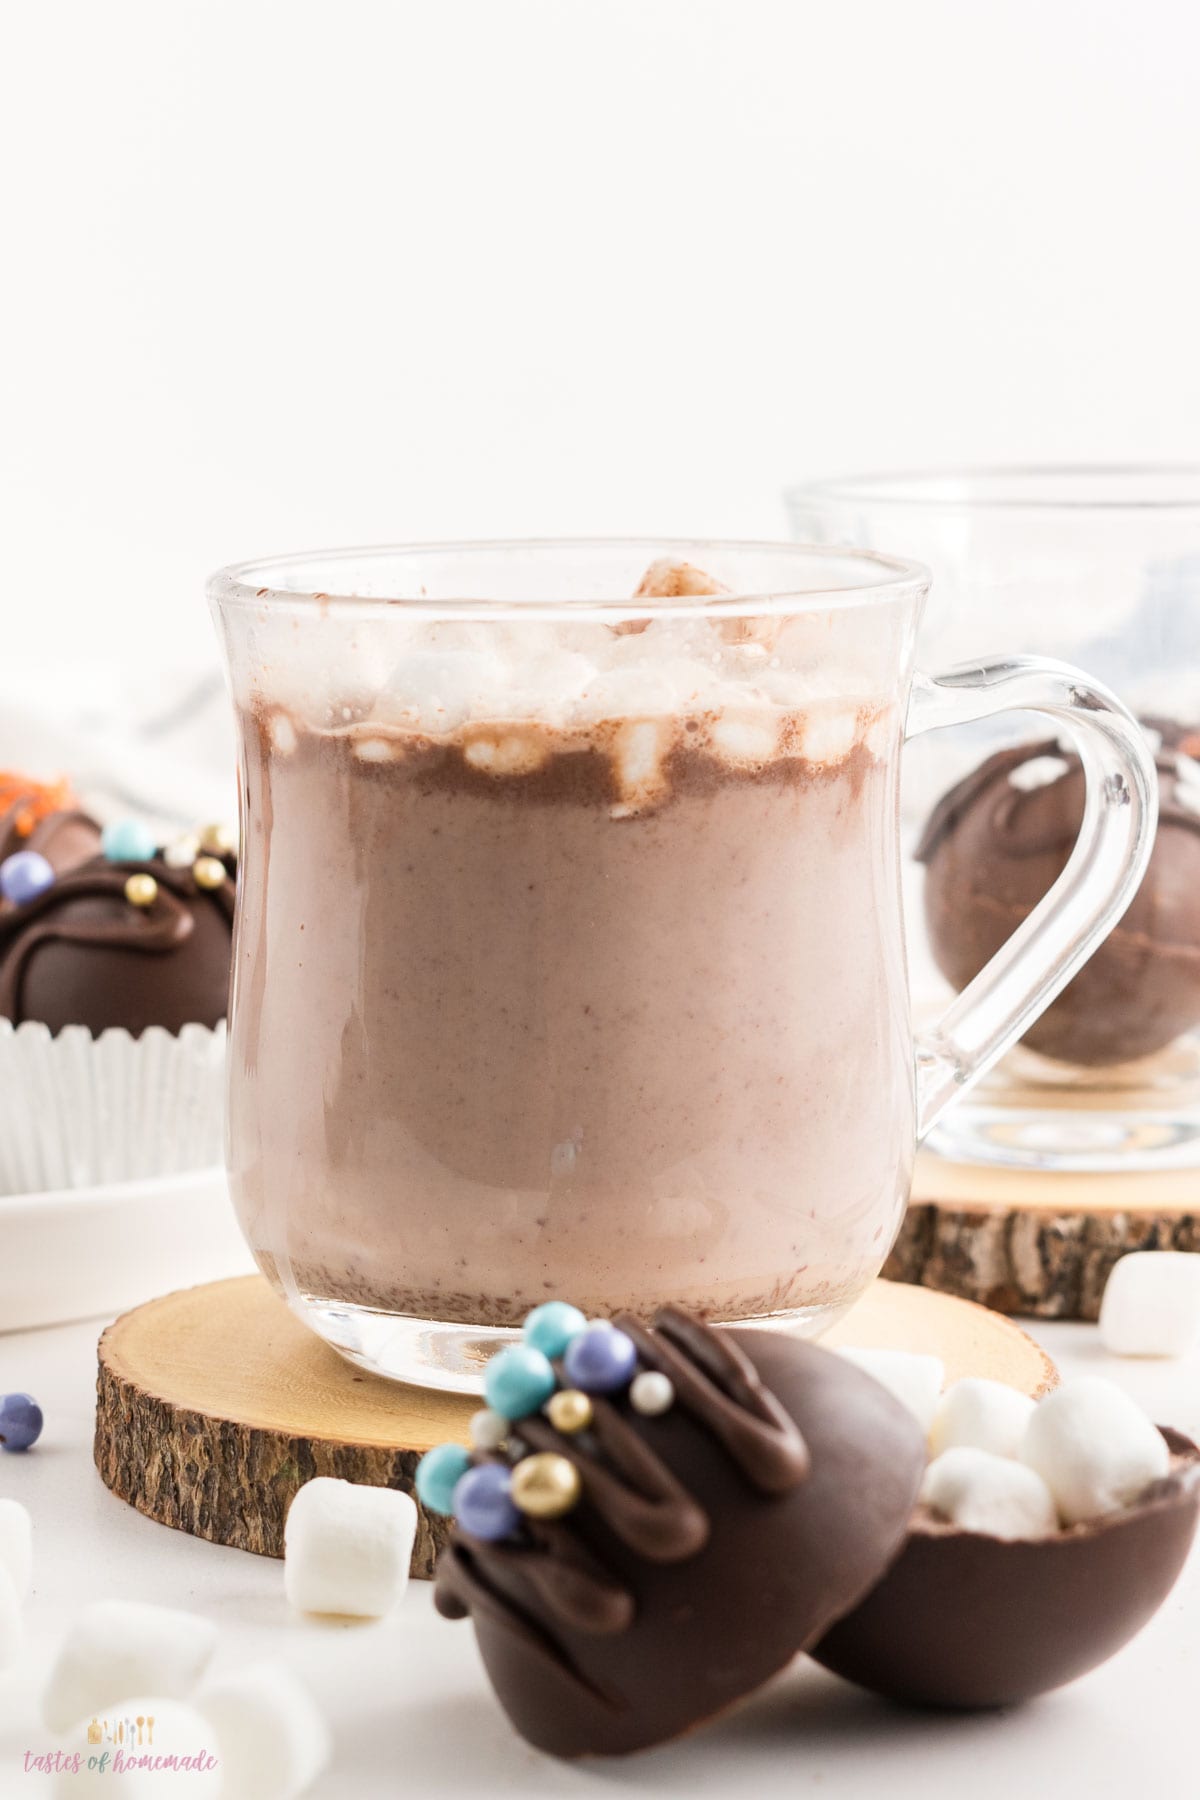
Serving hot chocolate bombs is as easy as dropping one in a mug, adding hot milk, allowing the sphere of chocolate to melt, and then stirring it. However, you can do a few things to ensure the experience is fun and delicious for everyone.
To make your cocoa beverage, add one or two chocolate bombs to a mug and add as much hot milk as desired.
You will want to select a large mug wide enough to accommodate the hot cocoa bombs and enough space to add warm milk and stir without sloshing over the sides. Transparent glass mugs make for a pretty presentation, especially if you dip the rim in chocolate and sprinkles and add a whipped cream swirl.
Milk – You can use any milk you like when making hot chocolate. I often use 2% milk, as we often have it in the refrigerator. Using whole milk will result in a thicker, creamier hot chocolate, and using 1% or fat-free milk will result in a thinner, less rich drink.
If you are lactose intolerant or vegan, you can use any dairy-free milk you like. Oat milk tends to work the best as it is slightly thicker and has a more neutral flavour, but you can use almond milk. If you are vegan or need to avoid dairy, you must also ensure you use vegan chocolate and hot chocolate mix when making cocoa bombs.
To melt the chocolate smoothly, you need to ensure the milk is hot. How hot will depend a bit on the quality of chocolate you use; chocolate with a lot of cocoa butter will take less heat, while lower quality chocolate with more fillers will require hotter liquid to melt it smoothly.
If you are making these for little ones who don’t like their drink super hot, start with enough hot milk to melt the chocolate, then add a splash or two of cold milk to bring it to the preferred temperature.
Garnish – This is where you can get creative. Dip the mug’s rim in melted chocolate, then add crushed candy cane or sprinkles. A handful of marshmallows are always great with hot cocoa. You can also sprinkle with cocoa powder, add shaved chocolate, candy sprinkles, or drizzle with chocolate or caramel sauce. The options are endless.
For some extra fun, serve your hot chocolate with chocolate-covered marshmallows or marshmallow pops.

Equipment Needed
This post may contain affiliate links. As an Amazon Associate, I earn from qualifying purchase
The two main pieces of equipment you will need to make hot chocolate bombs are hot chocolate bomb molds, silicone molds are my favourite and the easiest to work with, and a small pastry brush to brush the chocolate into the molds. If you don’t have a brush, you can use the back of a spoon.
There are many sizes and shapes of silicone mold to choose from.
- 2.1-inch silicone molds – This is the size I choose for making my hot chocolate bombs and will give you an excellent 10 or 12-ounce hot chocolate.
- 2.5-inch silicone molds – This mold will make a bigger chocolate bomb, meaning you can fill it with more goodies and make a larger cup of hot chocolate. You will also require a wider mug for it to fit.
- Shaped silicone molds – If you want to get more creative, many fun-shaped molds are on the market, allowing you to personalize your chocolate bombs for any occasion. Heart silicone molds are fun for Valentine’s day or pumpkin shaped molds for Halloween.
- Mugs – To serve your hot chocolate, you will need a mug. You need to choose a mug that is wide enough to hold the chocolate sphere and large enough to add the milk and stir without sloshing. Any large cup will do, but transparent glass mugs give a lovely presentation.
You will also need a double boiler or a microwave and microwave-safe bowl.
How to Store Hot Chocolate Bombs
It is relatively easy to store hot chocolate bombs. Once they have had time to set, you can move them to an airtight container or ziplock bag.
Separating them with wax or parchment paper is a good idea to prevent the chocolate spheres from sticking to others in the container. Or you can place them in paper muffin liners. This also helps keep them from rolling around in the container, damaging the shell and pretty decorations.
You can store them in the refrigerator, but they will be fine at room temperature in most climates. The outer shell may become a bit foggy if exposed to changes in temperature and moisture, such as moving them in and out of the refrigerator, but they are still perfectly fine to consume and won’t affect the taste.
If giving these as a gift, you can wrap them in cellophane bags and tie them with a pretty ribbon. Or place them in decorative muffin liners in small boxes or containers. If you are giving more than one as a gift, a cake or cookie box with a transparent lid makes for a gorgeous package that looks like it came from a professional chocolate shop.
For a lovely host or Secret Santa gift for adults, a basket containing a couple of hot chocolate bombs, a small bottle of Bailey’s or Kahlua, and a nice mug is always a hit.
Top Tips & FAQS
- It is essential that not even a drop of water enters the chocolate as you are melting it or it will seize, making it impossible to spread.
- Choose a good quality chocolate for best results. Make sure cocoa butter is one of the top ingredients.
- When making your cup of hot chocolate, make sure the milk is hot, but not quite boiling. This will help ensure the chocolate bomb melts properly to give you a smooth cup of cocoa.
The fastest and easiest molds to use are silicone molds. You can purchase half dome or even use silicone muffin cups. I use half domes that are approximately 2 inches in diameter.
You can also use acrylic molds; however, you will need to prepare them properly and take the time to temper the chocolate, or they will not release from the molds.
You can simply use a good-quality baking chip to keep things the most economical. You can use higher-quality baking chocolate like Callebaut or Ghirardelli for a bit more decadence. I’ve also used melted Hershey or Lindt chocolate bars.
Just stay away from melting wafers. They are usually a bit waxy and have a combination of ingredients. Sometimes, they are only chocolate-flavored and are not even actual chocolate.
You can store them in the refrigerator or room temperature in an airtight container. They shouldn’t melt at room temperature unless you live in a hot climate.

More Chocolate Recipes

Hot Chocolate Bombs
Equipment
Ingredients
- 1 Cup chocolate chips or chopped chocolate plus extra for drizzling the top
- 6 Tbsp hot chocolate mix
- 1/2 Cup mini marshmallows
- 1-2 Tbsp Sprinkles or other decorations
Instructions
- Place a pot on the stove with a couple inches of water. Place a bowl over the pot and add the chocolate.
- Heat over medium low heat and stir until chocolate is melted and smooth.
- Remove pot from the stove, leaving the bowl in place. (this will keep the chocolate the proper consistency as you work)
- Place the chocolate molds on a baking sheet. Add about 2 teaspoons of chocolate to each cavity of the molds and, using a pastry brush, brush the chocolate to cover the inside making sure to get right to the edges.
- Place the tray in the freezer for about 5 mintues to allow the chocolate to set.
- Remove the tray from the freezer and repeat the process of filling the molds and brushing the chocolate over the inside (you will be adding another 2 teaspoons of chocolate per mold). Return the pan to the freeze for another 5-10 mintues until fully set.
- Remove the chocolate bowl from the pot and place a clean plate on top of the pot to warm.
- Carefully stretch the molds with your hands to loosen the chocolate.
- Add 1 tablespoon of cocoa mix to 6 of the halves and add 5-6 mini-marshmallows.
- Working one at a time, remove the empty halves from the mold. Place an empty shell face down on the warm plate to heat the edge. When you see the edge beginning to melt, remove from the plate and press to a filled half. Hold in place for a few seconds to help seal. Repeat with remaining shells.
- Place the tray back in the freezer for a few minutes to make sure the chocolate seal has set. Then remove from the freezer and carefully pop the bombs out of the mold.
- Decorate with a drizzle of melted chocolate and sprinkles, or any way you like.
Video
Notes
Nutrition
Nutritional information is based on third-party calculations and should be considered estimates. Actual nutritional content will vary with brands used, measuring methods, portion sizes and more.


I wish it included the ingredients for the hot cocoa mix, because of allergies we need to make everything from scratch and I’m having a hard time figuring out the correct ratios for Cocoa to sugar, plus cinnamon or other flavours.
I’m sure allergies must make everything so much more difficult. Even if I had a recipe for cocoa mix, I couldn’t promise that it would work for your dietary needs. I have seen recipes for hot cocoa on containers of unsweetened cocoa powder, and I bet you could even find some suggestions on the manufacturer’s websites as well. Good luck. I hope you find one that works for you.
Yesterday my bombs were beautiful, shiny and dark brown, when I finished making them. Today they have a dull appearance and a light brown haze. I stored them at room temp in a sealed plastic container. Any idea what happened? I used Ghiradelli semi sweet chips. Any way to save these?
Haze on chocolate can be caused by a number of things, but they are still perfectly fine to consume. It is usually “bloom” which happens when the fat rises to the surface of the chocolate. Surprisingly, the better the chocolate the more likely this is to happen as there is more cocoa butter in it. It can happen from overheating the chocolate, moisture, storing it where it’s too warm, among a number of other things. The only bombs I’ve had it happen to were ones that I stored in my cupboard above the coffee maker, which happened to be warmer than I thought, but it took about a month, not a day. And I’ve made dozens of these. It can also happen if the chocolate was old. There isn’t really any way to get rid of it from the cocoa bombs, but they are totally fine to use. If your house is on the warmer side you can try storing them somewhere cooler, (cold garage, or refrigerator if you need).
@Deanna, Thanks for those suggestions. We used the bombs, ignoring the bloom, and the cocoa tasted great. I made a couple more batches playing around with different techniques. One batch, I again did two coats of Ghirardelli, but I really watched my times in the freezer and the heat on the stove but that batch still bloomed. The second batch, I did a first coat of chocolate almond bark, then the second coat was Ghirardelli and they didn’t bloom. They were shiny brown and yummy. Third batch, I did one coat only of Ghirardelli, and I stored them in the fridge because instead of cocoa and marshmallows, we filled the bombs with chocolate mousse! Oh my gosh, those were fun and so delicious! Thanks for your post!!
I’m so glad you had success and have been enjoying your hot chocolate! Thanks for reporting back and for the great suggestions. Chocolate mousse sounds devine!
Oh My Gosh!! These were so much fun to make. Delicious to drink!! Invited a friend over and we made them together. We each “had” to drink our first one because they were the practice ones. : ) There’s definitely a learning curve. We each made one mold of six halves all the way through to the finish and learned a lot that way. Then we started over and it was much easier the next time through. And faster, too. Thanks so much for posting the great instructions.
That is so great, I’m glad you had so much fun.
So glad I found this recipe this year. I tried making these adorable treats last year and failed miserably. But this post and the video were very helpful and I can’t wait to make them again!
So glad to hear you found the info helpful and had success making them. Have fun making them again.
Hands down the best hot chocolate bombs I’ve made. I’ve tried several recipes online but these were the easiest to make. I added a small pinch of cinnamon to them and the flavor was fantastic!
I made these over the weekend and it came out perfect! I didn’t know how easy it was to make these given how beautiful they look. It definitely warmed us up and it was so fun watching it melt in our mugs. Thank you!
Hi Deanna! I just made these with my niece and it was so fun and delicious! We decorated them with rainbow sprinkles and edible glitter. We’re planning on making these again for Christmas. Excellent recipe!
Hello I’m planning on making these for a party can you freeze these so they can be made ahead of time and how would you do it thank you
I haven’t tried to freeze them. The thing with chocolate is that it can become sweaty when it’s frozen and thawed. But unless you are making these months ahead of time, or you live in a really warm climate, you will be fine to make them ahead and just store them at room temperature in air-tight containers. They will keep just fine. Enjoy!
Where did you find the bulk chocolate bars?
I just get my chocolate at any grocery store usually. But I’ve also purchased at our local bulk store and even Amazon.
Great tips turned out great
I love the recipe and the way you explained it with your additional notes thank you so much
If I make a big batch, how long will they last?
They should last for months as long as you didn’t add anything perishable to the middle.
How do I store these??
Just in an airtight container or ziplock bag. You can store them at room temperature, just don’t keep them anywhere too warm.
Can you use these with water instead of milk?
I’m sure you could. They won’t be as creamy though. You could also use any milk alternative such as almond or oat.
Can you use Bark for the shell?
Yes, you can use bark for the shell just fine. Enjoy!
We attempted SEVERAL (and I mean 5 or 6) different batches with bark and simply could not get them to turn out. They kept breaking. We finally switched to melting Hershey’s kisses and it was instant success after hours of failed attempts with the bark. It kept breaking, despite different thicknesses used, so I am not sure what the textural difference is, but you may want to save yourself some time!